Pages
- Home
- New in 2025
- Needlepoint Finishers
- Interviews
- Podcasts and Videos about Needlepoint
- Tutorials and Tips
- Monthly Clubs
- Needle Felting on Needlepoint Canvas UPDATED
- Beading on Needlepoint Canvas
- Blog-Stitching Links
- Teach Yourself Needlepoint & Embellishment
- Needle Painting with Thread on Needlepoint Canvas Tutorial
- Recommended Online Shops
- Counted Canvaswork Designers
- Counted Canvaswork Shops
- Where to Donate Unwanted Stash
- Where to Sell Unwanted Stash
- Where to Have Designs Put on Needlepoint Canvas
- How To Paint Your Own Needlepoint Canvas
- Learn How To Finish Needlepoint And Assemble Self-Finishing Items
- Turkeywork Tutorials
- Copyright, Trademark and Needlepoint
- Stitching Services
- Thread Colors for Faces and Skin
- Creating Needlepoint Plaids
- How to Clean or Restore Needlepoint
- Lefties Learn Basketweave
- Appraisers for Needlepoint
- Stitching with Ribbon on Needlepoint Canvas
- Trapunto, Repousse and Padding Explained
- Tips on Creating Bullions
- Cover A Canvas Entirely In Squares
- Monogram and Alphabet Sources
Sunday, November 30, 2008
The Reveal--The 14th Century Medieval Cat
Labels:
Kandace Merric,
medieval cat,
Pet Guardian Angels
Isn't she lovely? I adore her face and cat eyes and the gorgeous velvet beaded jacket she wears. The wonderful gold and silver medieval-inspired shapes of her gown are my second favorite things from this design. She was great fun to stitch and took only a bit over two weeks to do. I've discovered that Kandy's chosen interesting stitches for each animal and am looking forward to the next piece.
I think Kandace Merric's Household Pet Guardian Angels are going to be beautiful! There are other angels stitching pets for the ANG Auction set (you know who you are) and I'm about to start my next angel after I get a few things done on my gorgeous Squiggee piece.
You'll notice that I'm not doing any finishing right now with the Medieval Cat. I am going to test a finishing method for ease of assembly before I turn our French kitty into an ornament. After all, I promised easy finishing for all those who are stitching on this set with me.
Jane/Chilly Hollow
Main blog at http://blog.360.yahoo.com/chillyhollow
The Cover Up
Labels:
Kandace Merric,
medieval cat,
Pet Guardian Angels
I'm sure you are squinting at this picture, wondering if I OD'd on turkey Thanksgiving and started taking pictures of caterpillars or something. Nope, this is the Medieval Cat with her turkeywork. You just can't see her because I've covered the canvas with sheets of heavy paper.
Once my turkeywork is stitched, I then finish all the other parts of a canvas before cutting the turkeywork loops. If you look carefully at my previous blog entry's photo, you will see the loops at the collar have been cut and trimmed while the turkeywork along the bottom and front edge of the jacket still has uncut loops. You don't have to cut the loops, sometimes you'll want that loopy look, but for the Medieval Cat, she really needs dense short fur. So the loops must be cut and then trimmed down.
The first step toward achieving that look is to cut each loop. It's not easy to find them all as the turkeywork is thick, but brush the area with your fingers after each cut or two and you will find more loops to cut. I use the sharpest scissors I have for turkeywork, although at this stage, it isn't totally necessary. You will just cut the loops in the middle right now. You end up with what you see above, spiky bits that stick out at various lengths.
At this stage you need to cover the entire canvas before you start playing barber. Otherwise you will have little bits of the turkeywork thread all over the canvas, stuck to the other stitches, the beads, etc. By the way, I did my turkeywork in stages. I covered and cut the ruff before the jacket's edge and bottom had their turkeywork done. This helped me take good photos for you. But really you should do both areas at the same time, not in stages. I ended up with more bits of wool on my canvas because of how I worked.
I covered my canvas with heavy construction paper and taped the edges to each other so they wouldn't move around and uncover a section of my canvas. With just the turkeywork visible, take your sharpest scissors and start to trim the lengths to make them the same length. Turn the canvas so you can look at it from all angles, brush the turkeywork with your fingers to uncover lengths that were hidden, clean up the fuzz occasionally, and go slowly and carefully. Like cutting hair, you should just do a little at a time. The turkeywork will slowly turn into fur!
Use a real comb to carefully tease out strands that might still be an uncut loop or just stuck under their neighbors and longer than you want. Snip a bit at a time, step back and look at the area from all sides, then snip a bit more. Clean up the fuzzies as you work.
How dense a fur you get depends on how many strands of thread you used. Wool makes the most fur-like turkeywork but I love the sheen of wool/silk blends. However, I've made overdyed cotton floss turkeywork, I've added metallic threads to turkeywork, I've even put spots in my turkeywork to mimic ermine. This is an area where you can really do a lot of special things once you master the basics of the turkeywork stitch and become comfortable with giving your needlework a haircut. The most important things to remember are: 1) the more stands of thread you use, the denser and more fur-like the turkeywork will be; 2) you need the sharpest scissors you own to give a good haircut; and 3) this is not a race--go slowly and carefully and take a lot of time.
Once you think you are done, remove the paper and find all the fuzzies that managed to sneak under the paper. I used my pink hair tape to carefully remove some fuzz. Comb the fur with your fingers or a real comb, replace the paper and trim again. Almost certainly you'll need to do a bit more cautious trimming to make everything smooth.
You will notice in the photo of the finished Medieval Cat when I post it next that the collar fur is shorter than the jacket's front and bottom edges. I wanted the cat's face to stand out a bit so the turkeywork stitches were not placed as densely around her neck. If you aren't careful, turkeywork can overwhelm the other areas of your canvas.
Jane/Chilly Hollow
Main blog at http://blog.360.yahoo.com/chillyhollow
I Can't Let It Be
Labels:
Kandace Merric,
medieval cat,
Pet Guardian Angels
After I looked at the last photo of the Medieval Cat with her wings being beaded, I realized I needed to talk about the squashed turkeywork on the ruff around her neck. This piece was scanned, so the turkeywork loops were mashed flat by the scanner when I put the piece upside down on it to take the image. That makes it look rather odd.
This new photo has the second area of fur turkeyworked and the wings finished. Again, the turkeywork is mashed down. Think of this piece with the loops not mashed flat by glass and you'll know better what turkeywork looks like before the loops are cut.
As I've said before, there are many ways to do turkeywork. There are punch needle gadgets you can use (M's Canvashouse sells them -- see link below) but although they make for fast and dense turkeywork, you have to glue the back. I never liked that since I have trouble turning the canvas over for the glue without disturbing the loops which it is very easy to pull out. I think denser loops which wouldn't pull out easily would solve this problem but it is just as easy for me to sew each loop individually.
I think traditional turkeywork leaves a line of stitches at the top of the section you stitched this way which I find hard to hide. Cutting my loops a bit longer probably would take care of this, but I found a turkeywork variation I liked and have stuck to that. The moral of the story is to experiment a bit to find the technique you like for turkeywork.
Next time I'll talk about how I trim the stitch. Stay tuned!
Jane/Chilly Hollow
Main blog at http://blog.360.yahoo.com/chillyhollow
After a Break for Thanksgiving,
Labels:
Kandace Merric,
medieval cat,
Pet Guardian Angels
I'm back talking about the Medieval Cat in the Pet Guardian Angel series that I'm doing for the ANG Auction. The photo above shows the cat's wings underway. I've been charmed by Judy Harper's talk of skip tent stitching an area, then filling in the non stitched parts. Judy always puts her tent stitches on the raised thread intersection so that the bead sinks a bit and is held on the thread intersection of the canvas where it is not raised by the skip tent stitches. So I thought I'd try it for the wings. Above you see the entire wing stitched in white pearl cotton #8 from DMC in skip tent stitches. I've put white beads in the unstitched intersections which means rows of beads, which you see on the bottom left side. The bottom right of the wings is just the perle cotton stitches. See how regular the left side's beads look? At the top I started putting beads on top of the skip tent/bead rows to make it look less regular. I didn't like the rows being so even. I thought wings should be a little messy looking so they'd seem to be in motion. This photo shows all the steps, however. That way you can help figure out what you like and use this on anything you are stitching.
Again, the top of the wing has the skip tent in perle cotton, beads in the unstitched skipped areas, and random beads attached on top. The rest of the wing also has skip tent in perle cotton, but the bottom right side has no beads at all yet and the bottom left side has just the beads in the skipped areas among the skip tent stitches. Make sense?
I hope you'll try this. It is a fun thing to do.
Jane/Chilly Hollow
Main blog at http://blog.360.yahoo.com/chillyhollow
Thursday, November 27, 2008
Adding a Halo and a Fur Collar
Labels:
Kandace Merric,
medieval cat,
Pet Guardian Angels
Our French Medieval Cat in the Pet Guardian Angel series has a halo and fur trim along the collar and hem of her jacket. In the photo above you can see I've added a line of gold beads for the halo, tent stitching the background around the head first so that the beads can stick out a bit. I liked that look. I've also stitched the collar area in turkeywork with red Felicity's Garden, which is a silk/wool blend. I happened to have a skein in a very similar red to the red Petite Very Velvet and I really like the lush look of silk/wool blends in turkeywork, so that was an easy choice. Turkeywork is a stitch with many variations. I use one taught to me by Carole Lake. You start at the bottom of the area and come up/go down in the same hole, but don't pull the thread through. Holding the loop with the fingers of your other hand so it doesn't move, come up again in the hole above the hole that you came up in and went down in. Then go down in the hole you've sent your needle through twice already. This stitch variation is worked in horizontal rows from the bottom of an area up.
Another variation which is similar is a Stitch of the Month on the ANG website. This one is worked top down and you tie down your loop by using a hole two rows above the one you put the loop in. There are many more turkeywork variations but they all end up looking like the ruff around the cat's neck above before the loops are cut and the thread ends trimmed. Stay tuned to see how the turkeywork gets a haircut!
Happy Thanksgiving to all!
http://www.needlepoint.org/StitchOfTheMonth/2006/aug.php
Jane/Chilly Hollow
Main blog at http://blog.360.yahoo.com/chillyhollow
Wednesday, November 26, 2008
Fun Thanksgiving
Labels:
French Knot,
Jane Zimmerman,
monthly clubs,
Petei,
Santas
I'm beginning to pack to leave for the Thanksgiving holidays but I thought you guys might like to have a little fun browsing the Internet while your turkey cooks.
On Thanksgiving Day, Jane Zimmerman plans to have a few special items for sale on her website. If any of the Thanksgiving Special items don't appeal, browse the two Needlework History articles instead. One is about English Medieval embroidery and I plan to read it the next time I put down my French Medieval Cat in the Pet Guardian Angel series.
http://janezimmerman.com/
If you aren't a chart person, how about checking out the new monthly Petei Santa club for 2009 at The French Knot? You can read about it in their latest newsletter here and discover other treats in store.
http://www.thefrenchknot.com/newsletter.html
Have fun browsing while I'm away. I will be back Sunday.
Jane/Chilly Hollow
Main blog at http://blog.360.yahoo.com/chillyhollow
Pearl in Her Glory
Here is Pearl with her head wrap and her yakuta stitched. Her hair is done also. I tent stitched the hair with one ply of Soy Silk in black, then on top of it I stemed stiched tendrails of hair that flow the way real hair does. Pearl's hair and the geisha's overlap some, so I had to decide where one stopped and the other started. The designer put a slight line of gray between the two that I used as a guide.
I am happy with Pearl's looks even though laying the sea green 4 plies of Mandarin Floss smoothly across the padding lines was tedious and time-consuming.
Jane/Chilly Hollow
Main blog at http://blog.360.yahoo.com/chillyhollow
Tuesday, November 25, 2008
Pearl
I've started stitching the woman on the far left, the one with the wrapped head. I think of her as the cleaning lady/washerwoman, the jack-of-all-trades servant who does all the heavy lifting and cleaning. Her name is Pearl. She is the figure furthest from the viewer and there isn't a lot of her showing. I've already done the white and red flowers on her cotton yukata in the same white cotton perle I used for her face plus 4 plies of red Mandarin Floss. Her lips are also in the same red Mandarin floss. Since there isn't a lot of space and I want her figure to recede, her yukata, lips, and some of her head wrap are in tent stitches. I also plan to tent stitch her hair.
The important part of her wardrobe is the wrap around her hair to keep it tidy and out of the way as she works. This is painted a pale sea green with gray outlines the same color as the outlines of her face. I could have used the same thread for the outlines on her wrap as the outlines of her face but I decided to try Thread Gatherer's Oriental Linen in Seal Gray. This is a silk and linen blend, with the slight roughness of linen and the sheen of silk. It isn't a solid shade of gray, there are slightly lighter and darker tones. I thought that variation combined with the very pale shade of sea green of the wrap material would suggest a cloth that has been washed many times. Pearl is a bit vain--she matches her head wrap to her cotton kimono--but she is a practical soul and keeps everything spotless, which means her clothes are washed frequently and you know how cotton fades. In the photo above, the gray outlines are done and I've started padding the wrap with the thread I plan to stitch it with, Mandarin Floss #M875. This is a thread made from bamboo that has 6 plies like regular cotton floss. In the photo I've taken all six plies and done straight lines down the areas of the head wrap. The next steps will be to tent stitch her hair and the yakuta, then carefully lay four plies of the sea green Mandarin Floss across the wrap perpendicular to the lines that will raise those laid stitches slightly.
Jane/Chilly Hollow
Main blog at http://blog.360.yahoo.com/chillyhollow
Monday, November 24, 2008
Michele and the Trick or Treaters UPDATED
Labels:
Bristly Thistle,
Trick or Treaters
Michele of the Bristly Thistle in Michigan has been stitching this Tapestry Tent canvas (which will be distributed by Susan Roberts starting in January, if you want to track it down) of little trick-or-treaters for a while now, displaying photos on her blog with information about the stitches and threads she choose and why. I've been totally charmed by the Bristly Thistle blog and enjoyed each and every photo of each and every figure and part of the canvas. Nice job, Michele!
http://bristlythistle.blogspot.com/
UPDATE: Judy asked if Susan Roberts was distributing Tapestry Tent designs now. That's what the rumor mill says, Judy.
When I asked Michele permission to use her photo, she told me she had the canvases on order from the distributor for her shop and would do a stitch guide for them when they arrived, but the backorders for TT would ship first. So it'll be a while. Anyone interested should go to Michele's blog and look for the shop website link on the right, then find email Bristly Thistle to get on a waiting list for the canvas and/or stitch guide.
Jane/Chilly Hollow
Main blog at http://blog.360.yahoo.com/chillyhollow
Jane/Chilly Hollow
Main blog at http://blog.360.yahoo.com/chillyhollow
Encroaching Background
Before I stop talking about the Skinny Willow background entirely, I thought I'd mention two things that helped me stitch it successfully--and that apply to any background stitch that doesn't cover the painted canvas underneath entirely.
The first thing is that the background may encroach into other painted areas. You'll see in the photo above that I stitched right over the hair ornaments. There are also a few stitches that go over the black hair of either the maid or the geisha. I discovered doing Skinny Willow that a stitch over one thread disappeared. I ended up compensating with two stitches instead, which meant one stitch went a bit too far. Since I'm going to cover the hair ornaments and the hair with other stitches, one little stitch in one ply is no big deal. It will be covered up easily and helps the background compensated stitches look better.
The other thing you need to remember with all stitches that let the paint underneath show through is to secure them on the back very well. I tied a tiny knot in my length of DMC cotton and ran it under a few stitches on the back before starting, made sure I pulled each stitch snug, and run the tail end under a few stitches going one way and then another when I finished. Light coverage stitches wiggle their way loose on the background as there isn't much to anchor them, espeically if they are a silk floss. Silk is like beads--an escape artist--so beware.
Next I started work on the woman in the background, the laundrywoman or cook with the head wrap and the bright and cheerful yukata, which is a light cotton summer kimono. Her name is Pearl. More about her next time.
Jane/Chilly Hollow
Main blog at http://blog.360.yahoo.com/chillyhollow
Sunday, November 23, 2008
The Battle with The Background
I've been busy with the background for Three Women and a Peach this weekend. It was a puzzle, as backgrounds usually are. First, I had to ignore my instincts and not plaster a tree limb or window in the background like I did with the Joan Thomasson wizard--remember the phoenix and the flagstone floor I added to that design? In the case of the wizard it grounded the figure in a setting but in this case I need to restrain myself in order to not violate the artistic intent of the designer.
Then I had to find a stitch that was inobtrusive but added a bit of texture to mimic the rice paper background that would be used by a Japanese artist. I also wanted a thread that matched the background color, which is not ecru, but brown. I got lucky there-DMC #612 is a perfect color match. So I had my thread and just needed to play around with various background stitches.
My test stitches (on the extreme right) and the stitch I settled on are in the photo above. I used a variation of Willow Stitch which I call Skinny Willow. I found Willow Stitch in the Stitches for Effect book (the first one) by Suzanne Howren and Beth Robertson, page 53. Willow Stitch is three vertical stitches, each over six threads, followed by three vertical stitches over two threads, and then the three vertical stitches over six threads, etc. The short vertical stitches are centered between the pairs of long vertical stitches. I decided this was too wide for my canvas--there's not much background, after all--and came up with the Skinny Willow variation which has two pairs of long vertical stitches plus two pairs of short vertical stitches. This stitch is worked in a horizontal line across the widest area of your design, then you work up or down from there. You can see in the photo I worked up from the base line. I hope to finish working down from there today so that I can move on to something a bit more interesting than background stitching.
The Skinny Willow stitches are hard to see because they are in one ply of my DMC #612 in the background canvas color. So I will diagram them for you on black plastic canvas in bright colors.
The first row is purple Felicity's Garden (a silk/wool blend) and the second is three plies of orange Needlepoint Inc. Silk. You can see how the long/short/long/short pairs of stitches interlock as you work them. You can also see how plies twist if you don't use a laying tool! This isn't a problem for me with one ply of DMC cotton but I did take greater care to make sure things lie flat on the real canvas.
Again, I found Willow Stitch in the Stitches for Effect book (the first one) by Suzanne Howren and Beth Robertson, page 53, then used it to come up with the smaller version above. You can always modify a stitch to suit its circumstances!
Jane/Chilly Hollow
Main blog at http://blog.360.yahoo.com/chillyhollow
The Missing Bear Found and Other Thoughts
Remember Susan and the missing piece to her TS Designs bear? I'm happy to say that she has the missing piece now and is dancing all around the locked and guarded room that contains the bear pieces. She says to tell everyone thank you very much and to remind you that if you take your needlepoint along when you are doing holiday travel this month and next, keep a careful eye on it! Susan's adventure wasn't all that much fun, even though she tried to keep her spirits up and there was a happy ending.
As for my changes to the list of blogs on the Blogspot blog, I've reverted to uploading them all manually. Even then there are blogs that won't display, probably because the ability to send out a feed is not enabled by the blog's owner. Blogspot only allows me to display twenty-five blogs and the list is set to display only the ones with recent blog entries. There are more I follow and if they post anything more recent, they will replace a blog with earlier postings.
Finally, Thanksgiving is next week (eeeek) and I will be away for several days. Don't worry if you visit Blog and don't find me there--I'm off eating turkey sandwiches and playing video games with my nieces. And handing over the Joan Thomasson wizard and the Maggie mini-stocking of the cat in a hat to their new owners.
Jane/Chilly Hollow
Main blog at http://blog.360.yahoo.com/chillyhollow
Saturday, November 22, 2008
Speaking of Blogs
Labels:
blogs,
painted canvases
I'm following along as several blog writers talk about painted canvases they are stitching. It's fascinating! Are you into Halloween? Then you have to see what Michele of Bristly Thistle is doing with this Tapestry Tent/Susan Roberts canvas!
http://bristlythistle.blogspot.com/
Is football your favorite television program to stitch to? Then you are going to love what Lynne Segill at Wellesley Needlepoint did with a Julie Paukert canvas of the Patriots' stadium outside of Boston. See the smoke coming from the guns? How about that sky? I never would have thought to do sky and clouds in the same rectangular Woven Ribbons stitch!
http://wellesleyneedlepoint.com/ExclusiveDesigns.shtml
Judy Harper is having a great time stitching a Squiggee mermaid. Isn't this a great canvas!? And it is small, too. You could stitch this before Christmas. Read the last link first. This is a blog, with the latest link on top of the list.
http://fairy-crafts.blogspot.com/2008/11/swimming-with-mermaids-again.html
http://fairy-crafts.blogspot.com/2008/11/joy-of-painted-canvas.html
http://fairy-crafts.blogspot.com/2008/10/mermaid-getting-started.html
When you don't have time to stitch yourself, a visit to see what other folks are doing is both inspiring and doesn't take that much time out of your day.
Jane/Chilly Hollow
Main blog at http://blog.360.yahoo.com/chillyhollow
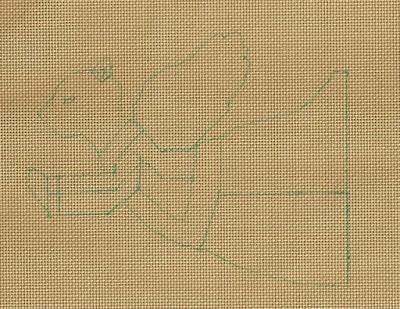
Fix That Hem
Labels:
Kandace Merric,
medieval cat,
Pet Guardian Angels
Yesterday I left the Medieval Cat with a blue line along her hem. To fix it, first I covered the line with continental stitches, the tent stitch variation that does well in vertical lines. Because the background tent stitches are in #8 perle cotton in the light colored ecru, they didn't quite cover and the blue line peeked through in places. If I'd been using an ecru wool, I probably wouldn't have this problem. Some threads are more elastic and cover better. If I'd been using DMC's #5 perle, the largest size after #8, it might have been ok also. And if the background had been navy, the blue lines might not have been noticeable.
But I didn't use a fatter or more stretchy thread or a darker color, so I had to cover up the problem. The photo above shows my first attempt. I laid a long line of silver Kreinik in #32 braid at the base of the skirt right on top of the blue line. You don't see it in the photo (I wanted you to see the blue line peeking from under the tent stitches) but I then put a line in gold under the red part of the skirt. I had planned to couch these down with a matching gold or silver blending filament but I didn't like the overall look. So my first attempt failed.
Not to worry, I am always full of ideas! I actually like mistakes because fixing them brings out my creative side. I have done my best stitching to fix problems.
Here's my second attempt. I stood the cat on her hem and stitched red and blue lazy daisy stitches along the base of the hem and covered the line that way. I like how this looks. It's not obtrusive and gives a nice decorative effect. In fact, I think I like this better than the plain hem that is intended for this angel. This is a cat from Medieval France according to the instructions. I can't see a French cat with a plain hem!
I may do something like this on another angel's hem. I also might try tracing the outlines for another angel onto my NP canvas with a hard pencil (4-6 hardness) as the instructions say. Who knows? A hard pencil might take good photos and not make me come up with neat tricks to hide my mistakes!
Jane/Chilly Hollow
Main blog at http://blog.360.yahoo.com/chillyhollow
Friday, November 21, 2008
Jeweled Cuff and Beaded Jacket
Labels:
Kandace Merric,
medieval cat,
Pet Guardian Angels
This next photo shows the Medieval Cat in the Household Pet Guardian Angel series with her jacket beaded and the lower skirt finished with gold and silver Kreinik in the centers of the trellis of diamonds. You can also see the jeweled cuff next to her paw. And you can also see the trouble I'm going to have at the hem of the skirt. See where the pattern ends right before the blue outline? I stitched the background tent stitches in DMC #8 perle cotton (color Ecru) right up to the line but not over it so you could see that I should have turned the cat onto her head and started the pattern of diamonds so that they covered the blue line, not stopped just before it. Why? Because the ecru tent stitches won't cover the blue line completely. (This is why I recommend that you use a light gray or yellow marker, not the blue I have to use for you to see photos of my canvas.) You will be able to see bits of blue between the stitches. I'll talk about what I did to take care of this problem later. If you look carefully at the cat's head and paw, you will see how fuzzy that area is and can anticipate what I ran into when stitching the tent stitched around those two areas. Of course you now know to tent stitch around any areas you plan to make fuzzies. Except for these two looming problems, she looks very nice, though!
Jane/Chilly Hollow
Main blog at http://blog.360.yahoo.com/chillyhollow
Thursday, November 20, 2008
Changes to Blogspot Layout UPDATED
Labels:
blog
UPDATE: It's become obvious that the list of blogs doesn't update properly. Blogs that have new postings don't automatically show up on the list, which sort of defeats the purpose. Right now I don't see a pattern in the updates, especially since some blogs that don't show up here are hosted by Blogspot. You'd think that they'd certainly be able to capture updated blogs on their own service! I'm going to watch this for a few days before changing how the list of blogs works again. It is possible that the blogs that don't show up don't have something enabled on their end. I'm also looking into why I can't post comments to my own blog. That's new just within the last week. Problems, problems! Anyone want to glare at Blogspot for me while I fiddle with the settings? Thanks.
I've made a few minor changes to the layout of Blog here at Blogspot. The list of blogs has been changed to display the needlepoint blogs I follow using Google Reader. However, only the five which have been recently updated are shown. I decided it would work better to give you only a few blogs that have new material than the whole list, some of which rarely are updated.
I've also removed the Canvas of the Day photo and replaced it with a photo of the original model of the Kandace Merric Household Pet Guardian Angel I'm stitching. You'll be able to see both the Squiggee painted canvas I hope to work on each weekend, and the current pet guardian angel I plan to stitch after work during the week. I find it nice myself to have a reference photo as well as the snippet of whatever someone is currently blogging about. I hope you like this also. Once all six pet guardian angels are stitched, I'll go back to a Canvas of the Day posting in this slot.
None of these things are possible with the Yahoo 360 blog so you won't see them there. Thanks for being patient while I re-arrange the virtual furniture.
Jane/Chilly Hollow
Main blog at http://blog.360.yahoo.com/chillyhollow
Step Two: Stand the Cat Up UPDATED
Labels:
Kandace Merric,
medieval cat,
Pet Guardian Angels
One of the very interesting things about this series of ornaments is how the designer uses the same stitch turned at a different angle to indicate different sections of the pet guardian angel's robes. This photo shows how the oriental stitch on the jacket is turned two different ways to show the parts of the jacket. No matter what angel you are stitching, study the photos and diagrams carefully to see whether your angel stands on its head, feet or side when you stitch each section.
You can see in the photo above that the cat has to be turned to stand on its hem to stitch the two parts of the robe. The skirt is done with three different types of threads in three steps--trellis outline, fill in the edges of the center with thread #2, fill the middles with thread #3 to make the shapes inside. This brings up a dilemma--how do you decide what threads to substitute for the originals if you plan to change things?
The original model which you've already seen was stitched with DMC #8 perle cotton, DMC floss, Kreink's B lager Braid #8 and #16, DMC Medici and Paternayan wool. The jacket was done with two colors of floss and two colors of #8 Kreinik. I decided to use Petite Very Velvet and beads instead. Beads can always substitute for one metallic stitch and I wanted a plush jacket. The fur on the jacket was originally the Paternayan, so I found 2 skeins of Felicty's Gardern in colors that matched my red and blue Petite Very Velvet. Felicity's Garden is a silk/wool blend and a lovely substitute for Paternayan if you don't need something that wears like iron. The wings were in perle cotton as was the skirt except for the Kreinik metallic #16 braid in gold and silver for the decorative shapes. I'll skip over the wings for now to talk about them in detail later. Looking at the skirt, I saw that it had three steps: framework in #8 perle cotton, outline around center diamond in floss, and centers in gold or silver. I kept the centers in the same thread and size but used red Frosty Rays and blue Soft Sheen Fyre Werks to do the shading inside the diamonds. The diamond trellis framework was stitched using the Petite Very Velvet used in the jacket.
I chose threads that could do the stitch ok (don't try to do a Rhodes Heart, for example, in 17 strands of floss, it's too hard!) and that would tie the design together. (Use the same thread for the jacket and robe-Petite Very Velvet-and use the same red for the fur trim as in the jacket and robe.)
It's trial and error but if you test stitch and experiment a bit, you'll be surprised and pleased at how much fun it is to put your own threads and color choices into a design.
UPDATE: Beth wanted to know where I used the Felicity's Garden and where I used the Petite Very Velvet since she was a bit confused. Blogspot hasn't allowed me to respond to Comments for two days now so I'll update this entry in case other folks are also confused. Beth, I used the red and the blue Petite Very Velvet for the cat's jacket and long skirt. The red and the blue Felicity's Garden will be used for the fur trim on the jacket and on the wings. It's not visible in any photos yet, so stay tuned.
Jane/Chilly Hollow
Main blog at http://blog.360.yahoo.com/chillyhollow
Wednesday, November 19, 2008
How Not To Stitch the Pet Guardian Angel Background
Labels:
Kandace Merric,
Me,
Pet Guardian Angels
Before we talk about the backgrounds for the Pet Guardian Angels, I need to tell everyone who is stitching a pet for the ANG Auction that I've emailed all the instructions out. If you signed up with me to stitch one of these and you haven't gotten your emailed instructions yet, email me at chilly hollowat hotmaildotcom and we'll try again.
Now for the background. The original model photo you saw yesterday has a blue Medici wool tent stitched background, as do all the original Kandace Merric angels. That's what she specified in the instructions. Of course DMC has discontinued Medici so I had to come up with a substitute background thread that would tie all the various angels together. I choose DMC ecru --either floss or perle cotton-- in tent stitches. (Some folks will use another thread that matches the DMC Ecru color and that's ok. We just need the right color and tent stitches to make all the angels a set.) If you are curious about DMC ecru, head over to this blog to see a photo of a skein. It just so happens that Laura Perin is using DMC ecru perle in her latest design. Check out the ecru skein in the middle of the photo. You can even read "ecru" on the label. This looks like the #5 perle. I have a ball of #8 perle cotton in DMC's ecru that I'm going to use since I have six angels and six backgrounds to stitch.
In the photo above you see I've substituted Petite Very Velvet in red and blue for the red and black threads in the original instructions. I also used beads on the jacket instead of metallic threads. You can also see the cat's head already stitched using a fuzzy black thread (Sorry, I don't know the name but it feels like Cashmere) and you see I tent stitched an outline in my ecru tent stitches about 1/2 inch from the angel outline and started filling in with basketweave.
The tent stitches were a mistake. I should not have done anything more except do an outline around the angel for now. If you tent stitch the background first, you may need to rip out if you need to take the stitches for the jacket one thread further across the line you drew for it. I've decided to tell folks not to do the background until last EXCEPT when you are using a fuzzy thread. See the cat's head? The black fuzzies from the head and paw started getting in the ecru tent stitches as I did the background around the head. If you are using a fuzzy dark thread anywhere on your angel, you should do the tent stitches around that area first so that the fuzzies won't stick in your ecru tent stitches. The head and paw are the most likely places folks will want a fuzzy thread, particularly for the dog and cat angels, and that area is less likely to need a stitch that goes over the line that separates the background from the angel itself.
What do you do if you did the background first and your ecru tent stitches have black fuzzies from the angel's head like me? In that case, cut a 3-4 inch length of metallic thread and put it in your needle. Figure out where a black fuzzy thread is stuck in the ecru tent stitches and run the metallic thread through that hole from front to back. Because there is no knot in the end of the metallic thread, it'll go right though the hole and the metallic thread will catch any fuzzy thread and pull it to the back. Be a little careful to not use too fat a metallic thread. You want it to go through a hole already full of ecru thread without damage to the ecru thread.
I also used a length of pink hair tape (the kind you get at the drugstore to tape curls in shape) to gently remove any fuzzies that were loose on top of the tent stitches. Pink hair tape doesn't have much sticky stuff so it won't disturb the ecru tent stitches but it will pick up any loose fuzzies.
If you are curious about pink hair tape, look at this website. It's the second picture from the top labeled "professional hair styling tape." Great stuff for your stitching toolbox!
Jane/Chilly Hollow
Main blog at http://blog.360.yahoo.com/chillyhollow
My Medieval Cat Outline
Labels:
Kandace Merric,
outline designs,
Pet Guardian Angels
The first step for any pet guardian angel design is to transfer the design to your 18 count canvas. Above you see the outline of the Medieval Cat. I made a copy of the outline from my magazine, taped the sheet to a sunny window, making sure it was straight, then taped the bare naked canvas on top of the copy, again making sure the grain of the canvas was straight.
Sometimes you can line up the canvas so that a long straight edge of the design underneath falls right on the long line of canvas threads. In this case, I lined up the vertical drop of the skirt edge to a thread. You can't always do this, but if you can, line something up. Use a very thin pencil or marker. I used a blue Zig Memory System marker that is colorfast if you take the canvas swimming and that has archival quality ink that won't react chemically later when your canvas is in a museum.
HOWEVER, you will want a similar quality marker in gray or yellow or another very light color. I had to use blue to show up in photos on Blog and I'm having a heck of a time covering the line with my ecru background thread so you don't see blue. I'll tell you what to do if you have a similar problem later, but for now, avoid the issue by using a very light-colored marker.
Trace the outline on your canvas, going slowly and trying to draw on a thread of the canvas instead of a ditch. Be as careful as you can to be faithful to the design (I discovered later I'd drawn one area too thin for the threads that belonged there) but don't obsess over it. I'll tell you later what to do if you drew an area too small.
You may find you need to lift the canvas and peek at the design to see if you missed something, so using masking tape or painter's tape that doesn't stick forever to hold the canvas over the line drawing might be helpful. Once you are sure you have everything transferred, remove the canvas and line drawing from your window (or light box if you have one) and check area-by-area once again to see if you forgot an eye, a paw, a line to show a fold in the animal's face. Once you are happy, put the copy you traced from away. We'll cut out the shape from that sheet like paper dolls later in finishing.
Now get your canvas onto stretcher bars and away we'll go!
Jane/Chilly Hollow
Main blog at http://blog.360.yahoo.com/chillyhollow
Tuesday, November 18, 2008
The Busy Needle Has a Newsletter--and a Sale!
Labels:
Busy Needle,
sales
The Busy Needle out in Arizona has posted their November newsletter and is half-way through a big sale. The sale information is easy to find, but the newsletter link is in the pink bar under the shop photo at the top of the page.
http://www.busyneedle.com/index.htm
Jane/Chilly Hollow
Main blog at http://blog.360.yahoo.com/chillyhollow
http://www.busyneedle.com/index.htm
Jane/Chilly Hollow
Main blog at http://blog.360.yahoo.com/chillyhollow
Introducing the Medieval Cat UPDATED
Labels:
Kandace Merric,
medieval cat,
Pet Guardian Angels
This photo is of Kandace Merric's Medieval Cat in the Household Pet Guardian Angel series. I decided I would start stitching the set for the ANG Auction with this piece and have had a great deal of fun customizing her to my tastes. UPDATE: This photo is of the designer's model, not my cat. I used different colors and changed the wings. You'll see photos of my version starting tomorrow.
The cat is in colors and stitches chosen to evoke Medieval themes in the 14th Century. And of course this is an angel to look over household pets, specifically cats. She is on 18 count canvas (I used ecru but the color doesn't matter as long as you steer clear of black and navy and dark green and other colors that white wings will have trouble covering) and is about the size of my hand from wrist to finger tips.
Last night I emailed the instructions for the cat and dog pet guardian angels to the angels who are helping me with this Auction project by stitching an angel of their own. If you asked me for a cat or dog pattern and didn't get it, let me know and we'll figure out how best to resend it. I'm going to alternate between stitching Pet Guardian Angels (which I can do at night during the week when I'm tired) and my beautiful Three Ladies and a Peach from Squiggee Designs (which will be my weekend stitching when I have more time and energy to decide how to best bring this canvas to life). Stay tuned!
Note to the medieval cat pet guardian angel stitchers. This photo is clickable to a larger size if you need to see details. Anyone who wants to jump in and join the group stitching of this set, please email me at chillyhollow athot mail dotcom for details, deadlines, etc
Main blog at http://blog.360.yahoo.com/chillyhollow
Sunday, November 16, 2008
While You Weren't Looking...
Labels:
cats,
finishing,
Maggie stocking
...I turned the Maggie mini stocking of the cat in a knit cap and coat I finished stitching early last spring into a sock ornament.
The edges are beaded with crystal beads to mimic ice and there are three snowflake charms that hang from the toe. I didn't blog about the finishing as I really didn't have the time to take all the necessary photos and write up my steps since this is a Christmas present that must be delivered Thanksgiving.
WHICH IS IN TWO WEEKS.
[Jane screams and runs around in circles]
Hope you like it. The back fabric is the same satin moire I used to back the wizard standup.
Jane/Chilly Hollow
Main blog at http://blog.360.yahoo.com/chillyhollow
Julia and Rebecca Visit Fireside
Labels:
Julia,
Rebecca Wood,
trunk shows
Actually, it is their trunk shows visiting the shop at Fireside Stitchery. I had a lot of fun browsing both shows. I especially liked the Noah's Ark animals Julia has that are in various settings--a roller coaster, an ark, an airplane and a bus. Very cute idea. Her realistic dogs and cats are wonderful portraits.
The Rebecca show is in two parts--stockings and everything else. Don't miss the large Nativity and the musical angel with instrument stockings!
And no, I'm not telling you what pages. Go explore!
http://www.firesidestitchery.com/Infoalerts/
Jane/Chilly Hollow
Main blog at http://blog.360.yahoo.com/chillyhollow
Saturday, November 15, 2008
Friday Was Leigh Day
Labels:
Leigh
My "local" needlework shop, Needlewoman East, is having a Leigh truck show, and thanks to a slow day at work Friday and some vacation time, I got to see it in all its glory. I've always liked Leigh Designs canvases and since I own one of her little round ornaments (the red one from the Chinese Dynasty set with the amazing dragon which you see above), I thought I'd see if I could pick up a second ornament, but one painted on the very lovely sea green canvas of the South Seas set. Let me tell you, it was worth the hour drive one-way and the sacrifice of three hours of vacation time to see this trunk show!
Here are the various dynasty ornaments. As you can see, each set draws from an historical period and culture for its images. Sadly the two South Sea ornaments with ladies on them I like and the palm tree one were all gone and the tiki and fish designs left didn't appeal to me. By the way, the photos don't show how beautiful the background canvas color is for these designs. It really is Sea Green! Guess I'll wait and pick up a mate for my dragon later. I was really tempted by two of the red ones from the Egyptian set, the papyrus and blue bird ones, but decided I wanted another color than red to round out my pair.
http://www.leighdesigns.com/ImgIdx2f.html
So I browsed all the canvases sent for the Leigh trunk show, and it was like opening a treasure chest and lifting out one fabulous jewel after another. You can't tell from the pictures on the Leigh Designs website much about the intensity of color and how important the backgrounds are to her canvases. Let me show you the new boot canvases. Charming, right? The photos don't show the mottled brown color wash on the background that will enable you to stitch no background at all and still have a work of art.
http://www.leighdesigns.com/Grp602x.html
The same thing is true of the Slovak designs. The backgrounds are painted with vibrant stripes which makes these riots of color and pattern. You don't see how clear and deep the colors are until you hold one in your hand.
http://www.leighdesigns.com/Grp420x.html
And the Brazil designs with birds are on a true pink canvas. You can't see it in the photos, but the pink background canvas gives these a tropical glow. I was seriously tempted by Rumba and Cha-Cha.
http://www.leighdesigns.com/Grp403x.html
These colorful pieces aren't all that Leigh designs, however. You have to see the subtle line of the penguins and puffins to really appreciate what she does. See the faint pattern in the background from Northwestern Native American art? Contrast that with the strong, dark colors of the birds and you have something that would be a restful pleasure to stitch and enjoy for years to come.
http://www.leighdesigns.com/Grp418x.html
I think the pumpkin canvases are going to be wildly popular. There were still a few of each for me to see. Leigh uses real pumpkin and squash colors but twines their vines to add touches that, combined with the cut out eyes and mouths, brings these to evil life. Sadly my favorite--Franken--was sold out so I didn't get to see him in person.
http://www.leighdesigns.com/Grp511x.html
I guess I should mention the classics which are still for sale in case any of you are close enough to go see Leigh's work for yourselves. The orchids are amazing and Leigh is doing large florals now. The large florals are almost gone, so hurry!
http://www.leighdesigns.com/ImgIdx2d.html
The Carnavale masks, whether large or small, are going fast. I had no idea the black backgrounds were so glittery, but of course metallics don't show up in person. The glitter seems to be woven into the needlepoint canvas! I understand Ruth Dilts has stitched one of these as a model. I hope to see that somewhere as I'd love to know how a master stitcher handles all the glitz without dimming it any. By the way, this link below also has the Bali drama masks. They are astounding in person, with great detail and a lot of color. I can understand now why Rosalyn Cherry-Soleil is so taken with the Chinese masks (second link).
http://www.leighdesigns.com/ImgIdx2a.html
http://www.stitchamaze.com/pieces-in-work/dramamasks.aspx
The Mad Hatter Ladies were on display as were the Starlets. I had no idea those movie stars had such beautiful features! You can't see the firm chins and Mona Lisa smiles in photos because of the amazing hats and jewelry. Luckily you can tell how funny and charming the Mad Hatters are in photos. They are classics and have been popular for years.
http://www.leighdesigns.com/Grp485x.html
http://www.leighdesigns.com/Grp488x.html
I saved my favorites for last, although I would encourage you to just go to the home page of Leigh Designs and browse the huge range of sizes, styles and colors that she does for us. I only talked about the pieces that caught my eye but Leigh has been doing this a while and has a lot of canvases for almost any taste (don't miss the Tall Ships!).
Luckily for my bank account, most of these were sold out or a geisha, a cowgirl and a Las Vegas showgirl might be living in Chilly Hollow today! These are all big canvases, although the tall and elegant geishas are the largest, and they are major impact pieces even before they are stitched. I can't imagine what they look after thread and beads and stitches are added.
http://www.leighdesigns.com/Grp500x.html
http://www.leighdesigns.com/Grp501x.html
http://www.leighdesigns.com/Grp502x.html
Jane, still drooling here in Chilly Hollow
Main blog at http://blog.360.yahoo.com/chillyhollow
November 2008 Chilly Hollow Newsletter Article
Labels:
newsletters
I've been happily browsing Orna Willis' new website and her blog, looking at this and that, with some things standing out in my mind as especially interesting.
Those of you who have admired her needlepoint bracelet cuffs will be thrilled to know she is doing rings now.
http://ornadesign.blogspot.com/2008/11/rings-and-things.html
Here are the cuffs on her website. Her work, which always seemed too loud and brassy in the photos to me, is fantastic in person. The colors are lively and the metallic gleams that no photo captures really makes everything so beautiful! I greatly enjoyed adapting her free cuff chart to bracelets for my nieces. Sadly that doesn't seem to have made the transition to her new website.
http://ornadesign.com/shop/home.php?cat=1
If quilts are more your thing than NP jewelry, how about visiting Debby's StitchWizard blog. She has photos from the Texas international quilt show up, plus there are more photos in her Flickr photo album. Whether you quilt or not, there's gorgeous eye candy and some very talented stitching to see.
http://stitchwizard.blogspot.com/2008/11/our-little-chicks-and-quilts-from-quilt.html
If you are thinking you might like to stitch a Christmas ornament, why not check out the display of Princess & Me models at Geez Leweez? Princess & Me furnishes the little canvas and a stitch guide, you supply the threads. Click on the little photos to see more. These are small designs and quick stitches, perfect to do during those football and basketball games. The second link below is to the Princess & Me website.
http://www.geezleweez.com/holidays.htm
http://www.princessandme.com/
Finally, thinking of Christmas makes me think of Christmas angels. Have you seen Judy Harper's? They are simply gorgeous!
http://fairy-crafts.blogspot.com/2008/10/st-francis-and-angels.html
Hope you enjoyed this inspirational browse on a break from Holiday Madness!
Jane/Chilly Hollow
Also blogging at http://blog.360.yahoo.com/chillyhollow
Jane/Chilly Hollow
Main blog at http://blog.360.yahoo.com/chillyhollow
Friday, November 14, 2008
Sandy Higgins Gives Me Standup Tips
Labels:
finishing,
Sandy Higgins,
tips
Yesterday I got an email from Sandy Higgins full of tips for finishing stand ups. Yes, THAT Sandy Higgings--who wrote one of the most popular and enduring finishing books! I was thrilled to speak to a giant in the finishing field!! And Sandy says I can share her wisdom about finishing standups with you! Here's what she said:
"Dear Jane, Your Wizard is great. May I offer a few suggestions to help with your finishing? I use loose polyester fiber fill by Fairfield Processing Co for stuffing, packing it in as tight as you can. The more stuffing you pack in will help eliminate the dents on the sides of the figure. To make the base more stable cut an oval shape from heavy mat board to fit the size of the base area. Cover the board with the backing fabric (I use fabric glue stick on the board to adhere the fabric to the board) and then hand sew it to the bottom edge of the figure. For a weight I made a pouch from muslin and fill it with buck shot that can be purchased at Wal-Mart. I often mix the buck shot with poly pellets by Fairfiled. I think you can get the poly pellets at Jo-Ann's or Michaels.
Cheers, Sandy Higgins
Sandy's Finishing Touches "
This is all great information. I think I'm going to use a glue stick for my next finishing project and I'll remember the tip for cardboard to stabilize the base of standups. The next time Jo Ann's or Michael's (a sewing store and crafts emporium respectively) has a sale, I'll look for the poly pellets. Thank you, Sandy!
Anyone who hasn't seen Sandy's book or who can't buy it at their local shop can see the book or order it from Sandy Higgins' website.
I grabbed a photo of the cover from A-Z Needlepoint who sell the book, naturally. I think it might also be available from Amazon.com.
Thanks, Sandy! I appreciate your taking the time to help me out here.
Jane/Chilly Hollow
Main blog at http://blog.360.yahoo.com/chillyhollow
Wednesday, November 12, 2008
Final Thoughts on the Wizard
Labels:
Joan Thomasson,
wizard
The wizard was my first standup piece and I'm very happy about how he turned out. There are things I wish were better--check out how the bottom of the wizard ripples a bit instead of being totally flat and look at the upper left side of the piece which is a bit dented where the stuffing has shifted.
I might have done better to have stuffed the wizard with stiff foam that I could cut instead of quilt batting that I packed in as tightly as possible followed by rocks in the base. He's fairly heavy and the owner will have to be careful in picking him up or the stitching will pull out eventually from the weight.
But overall I am very happy with him. I hope you enjoyed watching me stitch him and that you gained some ideas for your own stitching.
Jane/Chilly Hollow
Main blog at http://blog.360.yahoo.com/chillyhollow
The Wizard Stands On His Own
Labels:
finishing,
Joan Thomasson,
standup,
wizard
The Wizard is DONE! I am happy to say that I've finished two rows of beads around the base (the bottom is the larger purple beads used on the side edge, the top row smaller clear beads similar to the Sundance cryatal beads also used on the sides).
You can see the back of the stand-up figure in this photo as well as the beaded base and edges (sort of). It is in a medium blue moire cotton.
I'd like to thank Joan Thomasson for permission to show off this piece in such detail here. I had a blast stitching this piece, but that's nothing new with her Stitchin Stuff Designs--they are all wonderful!
If you are curious about the original piece, you can see it on Joan's website. Click on Catalog in the left hand column and then click on Holiday Spirits. My wizard is the Halloween spirit Santa instead of the Valentine one.
http://www.joanthomasson.com/
Jane/Chilly Hollow
Main blog at http://blog.360.yahoo.com/chillyhollow
Monday, November 10, 2008
Chillyhollow's Plan for the 2009 ANG Auction
Labels:
2009,
ANG Auction,
Kandace Merric,
Pet Guardian Angels
Through the kind offices of the designer Kandace Merric and the permission of Needlepointers magazine, I am able to share the instructions and line drawings for the Household Pet Guardian angels with folks who wish to stitch one or more angels for the ANG Auction in Milwaukee in the fall of 2009. Please note that the copyright of these designs belongs to Ms. Merric and the American Needlepoint Guild, so do not share your instructions with folks not working these for the Auction.
There are six Pet Guardian Angels: the Renaissance rat, Medieval cat, Tudor dog, Victorian parakeet, Baroque fish and Georgian rabbit. All the animals are dressed in period costume using colors appropriate to their period. The dog has three head shapes to choose from--the Westie which you see in the model--Ms.Merric raises West Highland White Terriers--a Dalmation and a Golden Retreiver . You don't have to stick to the colors and threads used in 1996-1997 when these were originally published in the magazine. Kandy Merric explains thatshe used cotton perle, Paternayan wool, Medici wool and Kreink metallics in her original instructions because these were easily obtainable at that time. If you have these threads, go ahead and use them if you like, but feel free to play around with other threads and colors. Ms. Merric loves it when a stitcher is bold enough to change colors!
However, I am asking everyone to stitch their angel with the same background color (ecru) using tent stitches. Use either DMC's color Ecru in cotton floss or cotton perle, or Splendor silk in color #961. If you want to use another thread brand, match the color to DMC Ecru or Splendor 961. I think it will be best if everyone trims their angel with Kreinik #32 braid in either gold or silver, as well. These are your constraints--use 18 count canvas, the background must be in tent stitches in ecru, and trim your ornament in either silver or gold #32 Kreinik braid. No matter what colors you dress your Pet Guardian Angel in, the same background color in tent stitch and Kreinik braid trim will make them all look like a set of folk art angels.
Pat Miller and I are working out easy finishing instructions for everyone to follow so that we can all make up our own angel in a similar, but easy manner. Feel free to have yours professionally finished if you like--just remember to trim with Kreinik #32 braid in either silver or gold. Also remember that we all will have to mail our angels to the ANG Auction chair the end of June 2009. That's the deadline and there is no wiggle room for it. I will keep track of everyone who is stitching an angel and let everyone know the address to mail their angel to in a reminder email later on. I will stitch all six designs myself publicly on Blog. Feel free to follow along when I get to your angel. I'm stitching them in random order as one takes my fancy, and hope to do one a month from now until early June.
The Pet Guardian Angels vary a bit in size (they are roughly 6+ inches long and 4+inches high) but they all fit on an 8 X 10 inch size of 18 count needlepoint canvas with margins of roughly 2 inches of unstitched canvas all the way around. The instructions are in PDF form if you don't have the necessary back issues of Needlepointers (see list below). You need to email me at chilly hollow athot maildot com which angel you are interested in and wait patiently for me to get the instructions to you. It won't be right away as I'll wait a week to see how many emails I have to send and organize things so that all the cats go out one day, all the fish the next, etc. I'll post my progress in sending instructions on Blog so you will know roughly when your PDFs should be in your email box. If you have the back issues of the magazine and will work from it, please email me which animal you are stitching and I'll remind you of the deadline for the Auction and where to send your animal as well.
Here are the original dates of the six Needlepointers where you can find the instructions if you have the back issues:
Medieval Cat - October/November 1996
Renaissance Rat - December 1996-January 1997
Tudor Dog - February/March 1997
Baroque Fish - May 1997
Georgian Rabbit - July 1997
Victorian Parakeet - September 1997
Ask any questions you can think of by emailing me at chillyhollow athot mail dotcom or posting a question in Comments. If you just can't see yourself stitching one of the Pet Guardian Angels, never fear--ANG has many styles of canvases that need stitching. Look at the 2009 Auction List (link below) and see if anything catches your eye, then email the ANG Auction chair to make sure it's available.
Jane/Chilly Hollow
Main blog at http://blog.360.yahoo.com/chillyhollow
A Close Look at the Pet Guardian Angels
Labels:
Kandace Merric,
Pet Guardian Angels
Here are the six Household Pet Guardian Angels, courtesy of Kandace Merric and ANG's Needlepointers Magazine. There is a cat, dog, parakeet, rat, fish and rabbit.
Jane/Chilly Hollow
Main blog at http://blog.360.yahoo.com/chillyhollow
Jane/Chilly Hollow
Main blog at http://blog.360.yahoo.com/chillyhollow
Saturday, November 8, 2008
2009 ANG Auction Scheme
Labels:
2009,
ANG Auction,
Kandace Merric,
Pet Guardian Angels
I've been thinking about what to stitch for the ANG Auction in Milwaukee in 2009. I rummaged around in my pile of painted canvases, trying to pick something that would bring ANG big bucks and be fun and educational to stitch. (Blog has standards, after all--if it isn't fun and I'm not going to learn anything, why am I stitching it?) I know that very large pieces and sets draw lots of bidders and since I'm not up to stitching a rug for ANG, I needed to find an ornament set I might do that would interest the folks with the money in their pockets.... That's when I remembered the old issue of Needlepointers pictured above.
See those angel ornaments? Those are the Household Pet Guardian Angels, designed by Kandace Merric. (first pet in Needlepointers magazine, October/November 1996). I've always thought they would be a fun stitch but what am I going to do with them? With the dogs and the cat so rambunctious, we don't do a Christmas tree for the holidays. Well, the Auction sounds like a great idea! Then I really got to thinking. Why not invite you all to stitch one of the angels, too? We could have a great pile for Auction! I think if we stick to not altering the stitches and using the same color in tent stitches for the background, they would look great in a riot of colors, sort of like folk art.
Naturally it didn't take long for me to realize that not everyone has a stack of old Needlepointers on their bookshelf. Fortunately, the designer Kandy Merric herself and the ANG Board came to my rescue at this point. They have agreed to let me scan and distribute the instructions for a pet guardian angel to folks who will stitch that one for the Auction.
Kandace Merric has also kindly agreed to stitch two angels herself which will be unique and not one of the six original designs. I am not sure which household pets she will do--a lot depends on how the animal head shapes work with the angel outfits she has in mind--but there will be two mystery angels to join the cat, the dog, the rabbit, the rat, the fish and the parakeet designs in the original set.
I owe a huge debt of thanks to Ms. Merric who has agreed to come out of NP teaching retirement (she concentrates her attention these days on dog rescue groups in the NYC area) to not only allow me to do this project, but to contribute to it herself. I also am very grateful to ANG's President Barbara Richardson, to Sandy Rodgers the editor of Needlepointers who helped point me to the right place for permission, and to Ann Strite-Kurz who contributed encouragement and a contact email address for Ms. Merric. No matter whether anyone else stitches an angel for the Auction, this has already been a huge group effort.
Next time I'll post a bit about the individual pet guardian angels and how I plan to organize this project.
Jane/Chilly Hollow
Main blog at http://blog.360.yahoo.com/chillyhollow
Jane Learns Pink Isn't Always Pretty
Labels:
Gail Hendrix,
squiggee,
Three Women and a Peach
I've actually made great progress on Squiggee's Japanese portraits. The ladies have all their white skin stitched in the photo above with basketweave stitch executed in DMC cotton perle #8. I had a ball of it I picked up somewhere on sale (along with a ball of ecru and one of black) and decided it would render the white skin of the women in smoother stitches than a white floss. I am happy with how it turned out.
If you look carefully at the faces, you see that the features are outlined in dark gray (4 plies of DMC cotton floss in 318) using mostly half cross stitch. I stitched the gray outlines first, then the skin, and finally the gray features like the noses, making sure not to drag a line of dark gray from one stop to another which might show behind the white.
My first thought was to change the skin color of the women to a pale pink and use a slightly darker pink for these outlines. I often use silk in these situations as the sheen makes the faces more real. I consulted the designer Gail Hendrix, who told me switching colors would throw off the muted color scheme, although she thought I could get away with darker/lighter shades of the colors. So I left the faces and arms dead white and now that the faces and arms are stitched, the white is growing on me once I put aside my pre-conceptions that I needed to make this piece realistic, which it is not. This piece was designed with Japanese artistic sensibilities in mind.
Before I end this, I should mention a few things about stitching with white cotton perle. I stuck to short lengths and tried to remember to keep my needle perpendicular to the NP canvas when I stitched so as not to abrade the cotton perle much. In my experience it looses its shine if you run a length through the canvas too many times. I also discovered it was really important to wash my hands each time I stitched with white thread. The cotton perle easily absorbed the tiniest amount of dirt on my fingers which of course shows as a smudged spot on the canvas.
Before I forget, I have not stitched the red mouths yet. Right now I'm debating whether to leave the area unstitched or not.
Next time I'll talk about choosing a background stitch and thread. Until then, remember that Pink isn't always Pretty! LOL
Jane/Chilly Hollow
Main blog at http://blog.360.yahoo.com/chillyhollow
Friday, November 7, 2008
Jane Learns She is Chinese
Labels:
Gail Hendrix,
squiggee,
Three Women and a Peach
Once my Squiggee canvas of the Three Women and the Peach arrived, I spent a lot of time looking at it and thinking about how to stitch it. Gail Hendrix, the designer, told me this piece was based on Japanese art, hence the white makeup, the brown background to mimic the rice paper such pieces are often painted on, etc.
At first I thought these ladies might be Chinese so I consulted with a friend who is an Asian scholar to make sure I had their nationality right (Japanese) and to ask about the symbolism and clothing of the ladies. She answered:
"The lady with a peach is highest ranking. A peach symbolizes longevity in both Chinese and Japanese cultures. This kimono would be of silk. Her hair ornaments are gold and silver. She is wearing the traditional geisha wig. The woman with the head wrap is a servant. Her yukata would be of cotton. The other woman is probably the lady's maid. Her yukata looks like it is also cotton but most likely a better quality. Her hair ornaments are most likely lacquer and there appears to be a bow of some type that is probably cotton."
This tells me this piece is all about texture. I'll need to choose the right type of thread to make the clothing of each woman appropriate to her rank. And I decided I wanted an open background stitch in the same brown color (it is exactly DMC #612 for those who are interested) as the canvas itself so that I'd get the correct rice paper effect. When I started testing background stitches, I discovered that the open space above the heads of the middle and right woman bothered me a lot. I wanted to put something there to fill the space, perhaps a window, or maybe a tree branch with pretty Japanese maple leaves, something.
My urge to fill in the negative space amused my friend the Asian scholar greatly. I got a short lesson on Japanese art, their use of emptiness to emphasize what is there and how my urge to cover everything was most like Chinese art.
She wrote, "Westerners are uncomfortable with negative space, whereas Japanese are not only comfortable with negative space, they exult in it. All that negative space is what makes Japanese art so soothing, unlike the wild, tumultuous crowded Chinese art that makes you jumpy. If you are concerned about space, just use the character for woman. Make it blend into the background, which I would do in a linen thread. I love it and it will look a lot like the matsor screens in Japan. You could embroider the character(s) OVER the finished background - just make sure character(s) and background are the same color."
She found the Chinese characters for "three" and "women" (which the Japanese use) and I will embroider those on top of the background on the left side near the arm of the woman with the head wrap. So I'll have a bit of extra in the background without ruining the Japanese feel of the piece that Gail Hendrix so faithfully copied!
Jane/Chilly Hollow
Main blog at http://blog.360.yahoo.com/chillyhollow
Thursday, November 6, 2008
Mystery of the Missing Jane
Labels:
Alison Cole,
blog,
Laura Perin,
Orna Willis
You are probably wondering where I am since missing posting for several days in a row isn't like me. I've been sick, courtesy of a tick that latched onto my arm. I have a sore arm, inflammation around the bite site, and both nausea and fever. I haven't really felt like stitching and I have not felt up to posting, either. Putting two words together and then typing them has been beyond me. But I am better, courtesy of the antibiotics, and I'll learn Monday if the blood tests show anything that means I need more antibiotics. It's almost certainly a skin infection, courtesy of the sharp tick teeth, but the blood tests are to make sure.
While I curl up in the comfy chair with a good book, you might have fun reading a two-part interview Mary Corbet did with the fabulous Austrailian goldwork/stumpwork designer Alison Cole.
http://www.needlenthread.com/2008/11/designer-spotlight-alison-cole.html
http://www.needlenthread.com/2008/11/alison-cole-on-publishing-needlework.html
Orna Willis has redone her website. It is easier to navigate but each nook and cranny has lovely things to see and perhaps stitch.
http://www.ornadesign.com/
Laura Perin has continued to post more great border ideas on her blog.
http://two-handedstitcher.blogspot.com/2008/11/border-bits.html
http://two-handedstitcher.blogspot.com/2008/10/bored-with-borders-yet.html
I hope to be back stitching this weekend. Sorry for the delay!
Jane/Chilly Hollow
Main blog at http://blog.360.yahoo.com/chillyhollow
Monday, November 3, 2008
Mystery of the Missing Bear UPDATED
Labels:
bear,
TS Designs
Have you seen this bear? Susan was traveling and tired and let the final piece of twelve slip out of her bag on an airplane. She's had no luck in finding her lost canvas or in tracking down a replacement canvas as this is an older piece from TS Designs that is a Bar Mitzvah Bear. It came with fringe to put on the tallis and is 14 count. She also lost the photo of the finished piece and the instructions, so even those are better than nothing if you stitched this bear and have them buried in the bottom of your closet.
The piece she lost was the bottom section in the above photo. So rummage through your stash, search the local shop's inventory, and rack your brains. If you have seen this bear anyplace email me at chillyhollowat hot maildot com and I'll forward your message to Susan.
Thanks! You all are The Best!
UPDATE: We now have a lead on where to contact the former owner of TS Designs and know where the bear was painted so we can contact them for a copy of the piece pattern. You guys are amazing!
Jane/Chilly Hollow
Main blog at http://blog.360.yahoo.com/chillyhollow
Subscribe to:
Posts (Atom)